OpenAI just relaunched the web browsing feature on ChatGPT, allowing users to access real-time information and direct links without limitations on data predating September 2021. The feature that was originally launched in May was temporarily disabled in July due to certain issues, including the chatbot’s ability to retrieve and display content from pages behind paywalls. It has since been improved with updates, including compliance with robots.txt and user agent identification.
The web browsing feature is currently available for Plus and Enterprise users, with plans for expansion to all users in the future. It is designed to assist with tasks requiring real-time information, such as technical research, shopping, or travel planning.
Here is a quick guide on how to use it after you’re on the chat interface of ChatGPT. To get there, you’ll have to log on to its website, and sign up or log in. You cannot use ChatGPT without logging in. If you’re signing up, it would require your email address, and in some cases your phone number too. There’s also an option to sign in using your Google, Microsoft, or Apple account, without having to type it.
Once you’re logged in, please follow the following steps.
(Please note that the browsing feature is not available for users on free plan of ChatGPT. If you’re using a free plan and would like to use the browsing feature, you will first have to upgrade to a paid version, Premium or Enterprise).
Step 1. Enable the web browsing feature
Click on the email address displayed in the bottom left corner (navigation) of the ChatGPT chat interface. Clicking it will open a small menu with four options. From there, click on “Settings & Beta.”
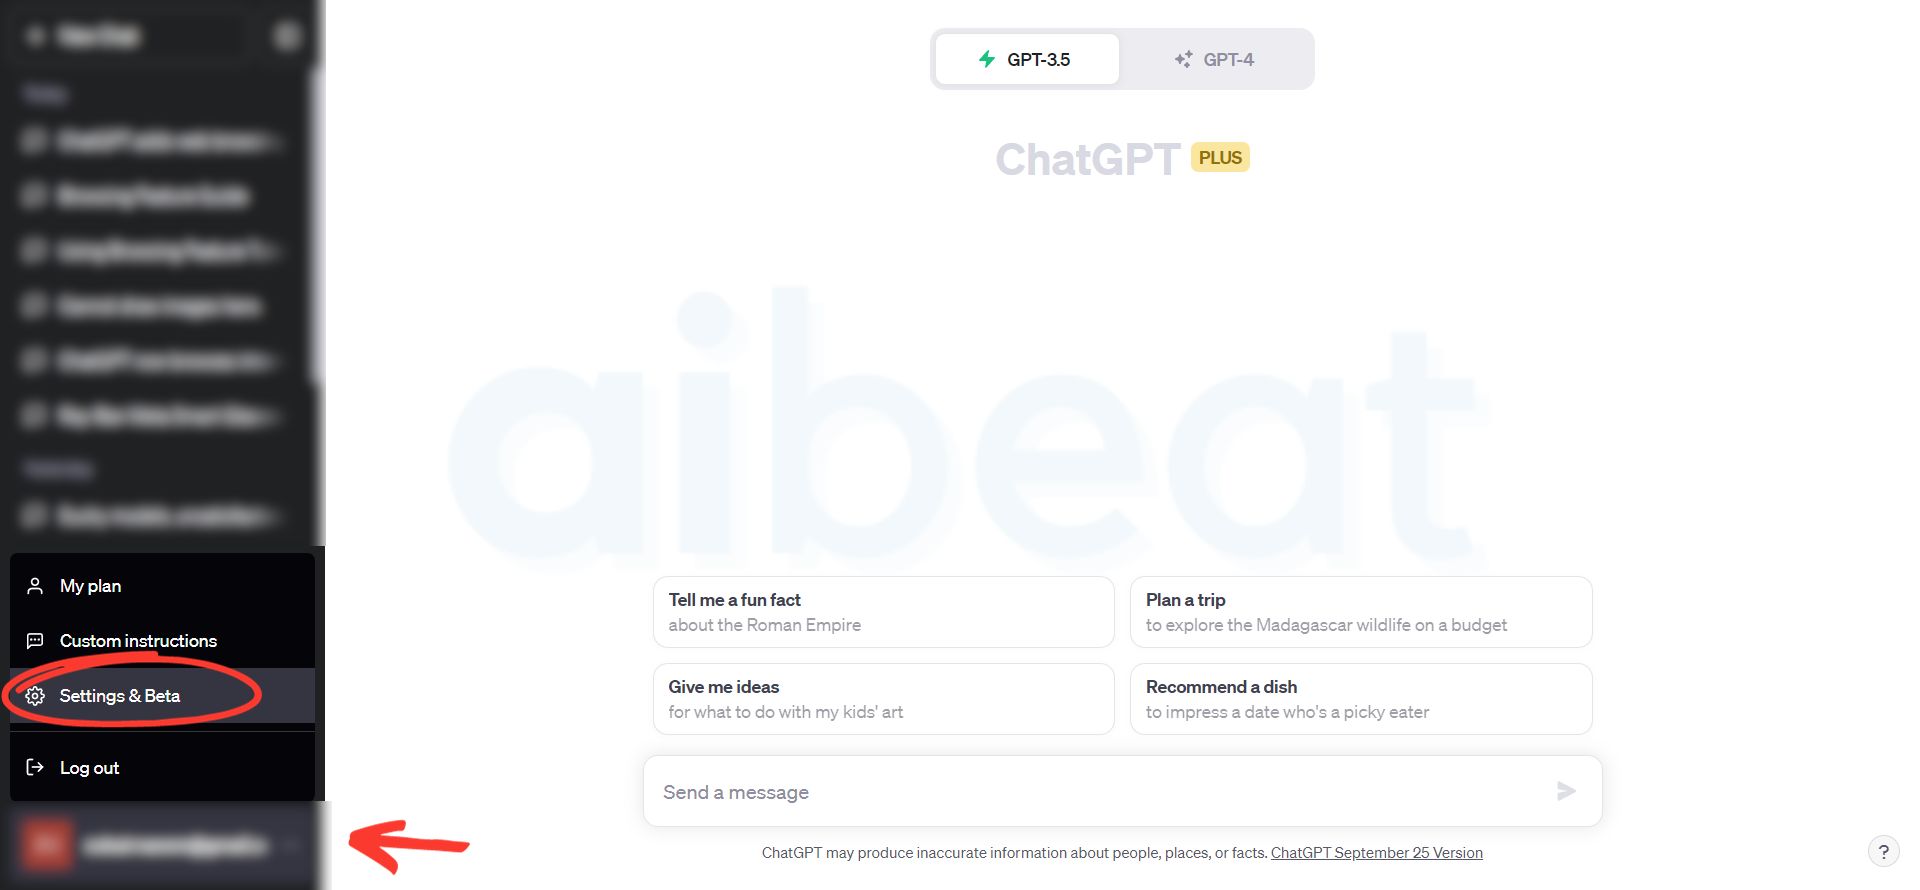
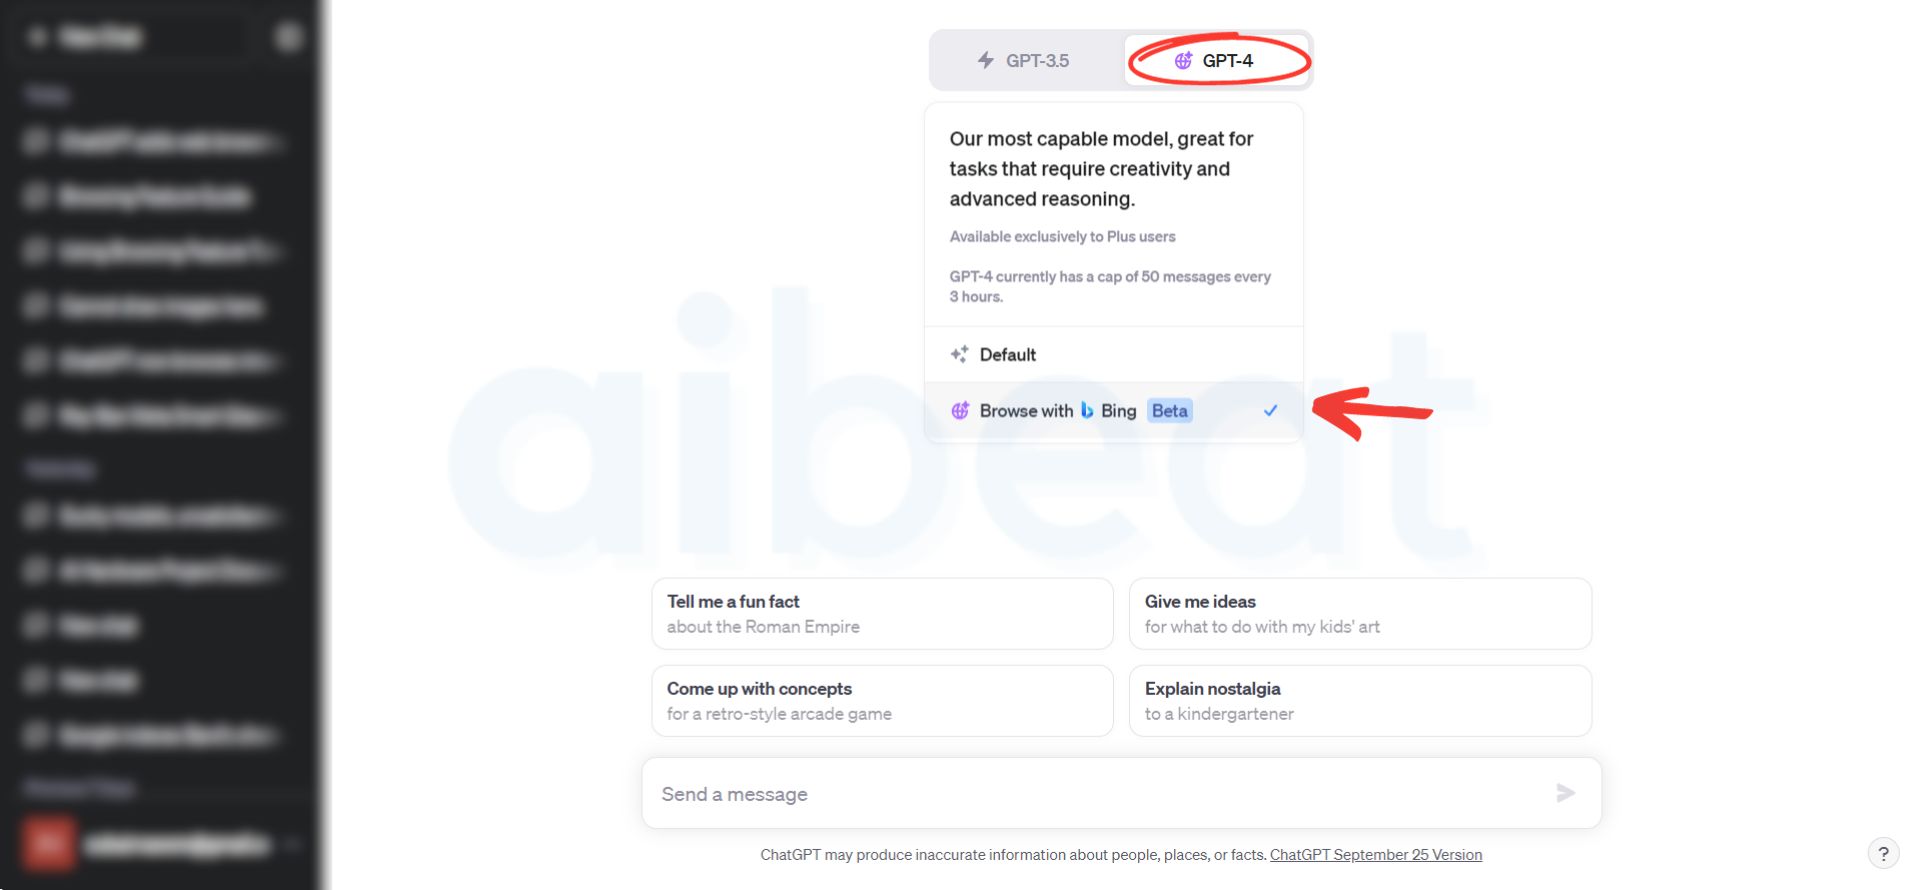
In the settings window, open the Beta features menu by clicking on it, and then turn on the ‘Browse with Bing’ option. With this step, you have successfully activated the web browsing feature on ChatGPT. Now, let’s learn how to actually use it.
Step 2. Initiating a web browsing session
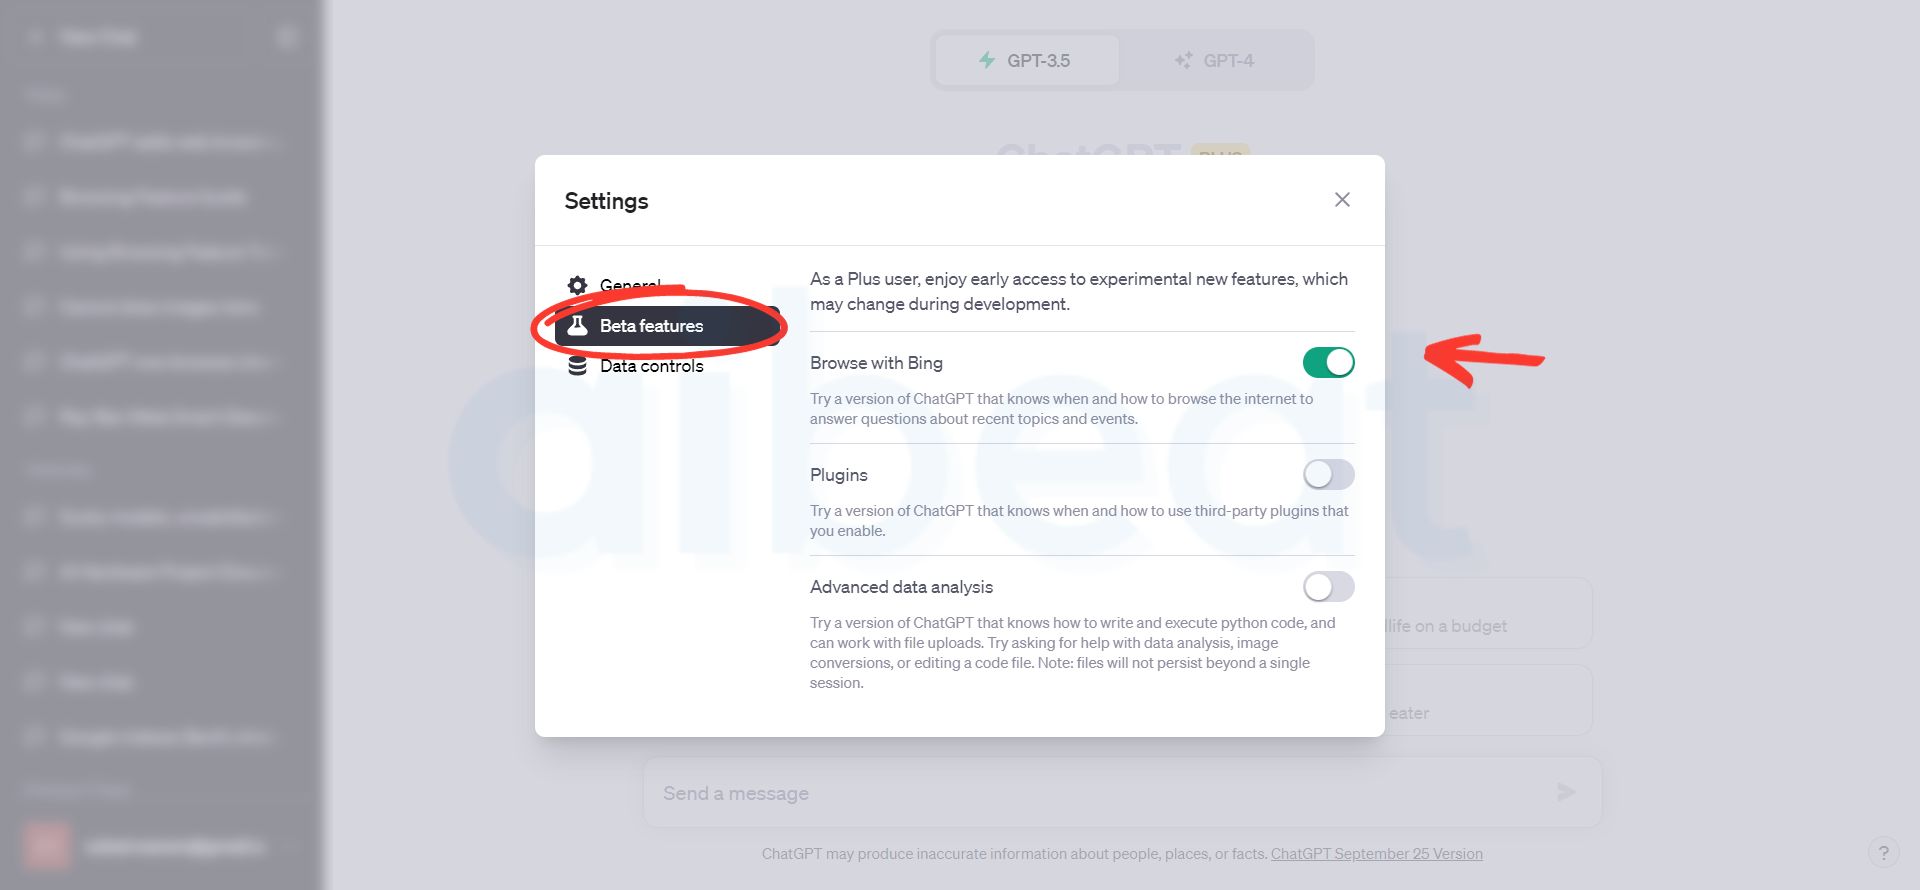
Once you’ve enabled the web browsing feature, start a new chat by refreshing the chat interface or clicking on “New Chat” from the top left corner (navigation). After a new chat session appears, click on “GPT-4,” as shown in the screenshot below.
It will open a small menu with two options. Select “Browse with Bing (Beta)” to initiate a ChatGPT session with web browsing, which would allow you to access real-time information on just about anything.
Step 3. Interacting in the browsing session
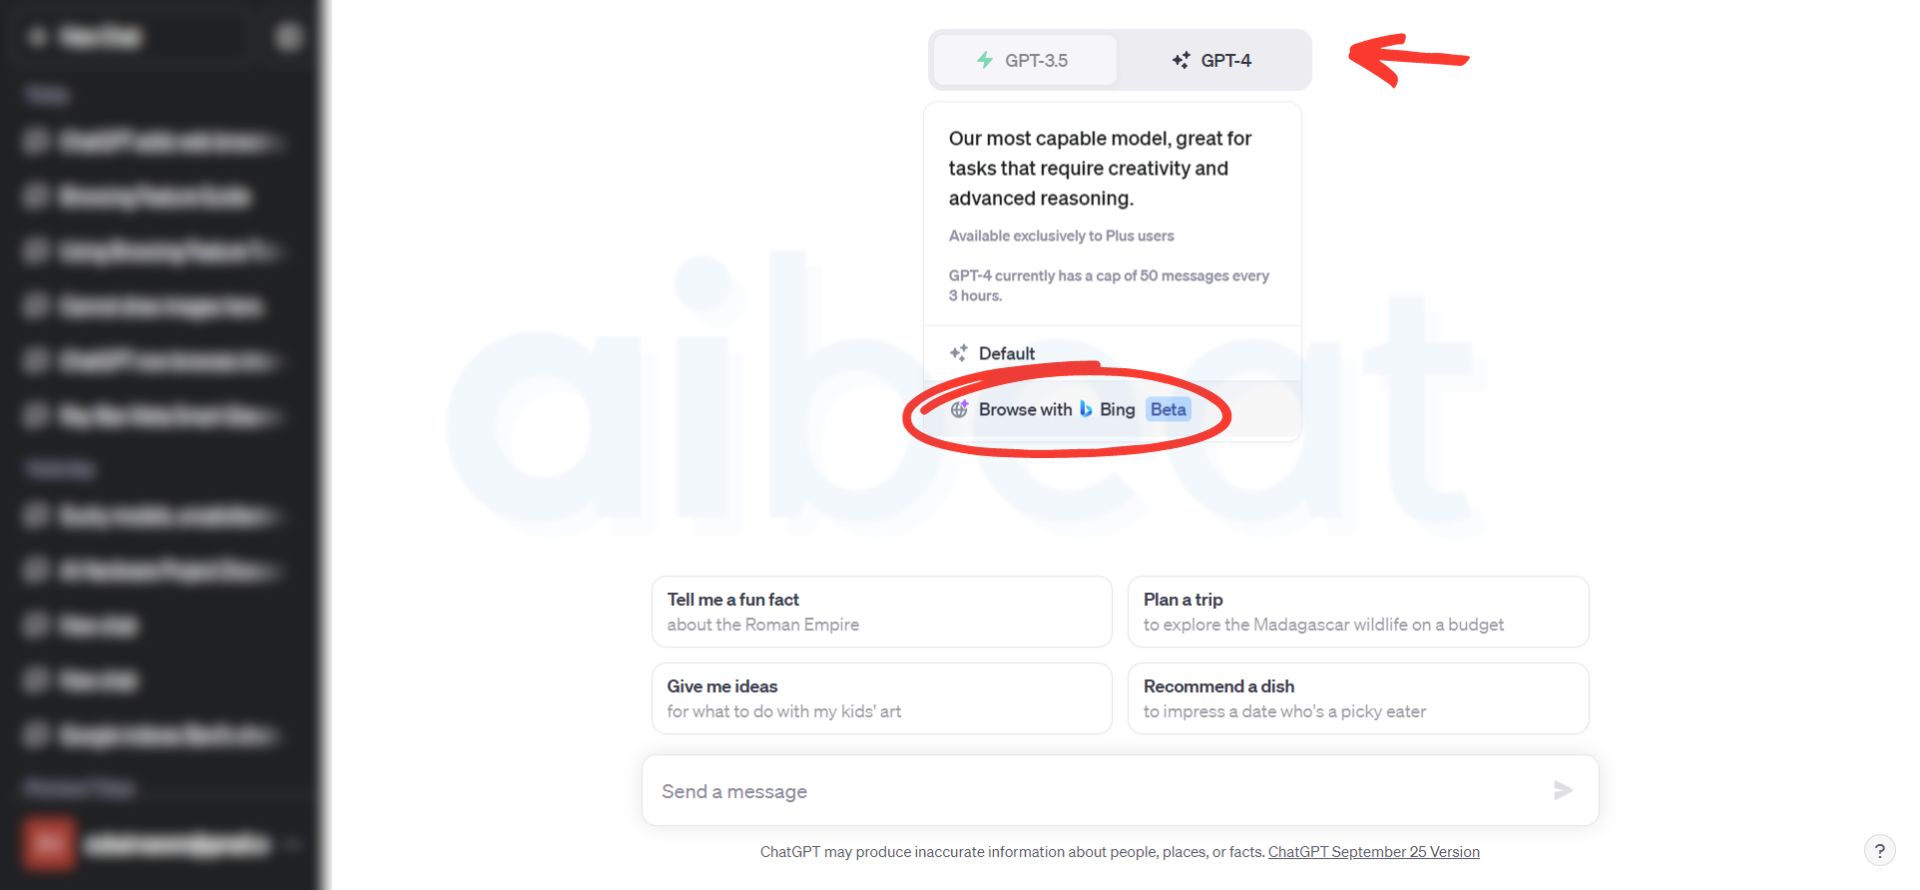
If the browsing session has been activated, you will see ChatGPT showing ‘Web Browsing’ in the top bar, as highlighted in the screenshot below. Whenever you enter a prompt, the chatbot will respond with the action it is performing before showing ‘Finished Browsing’ and sharing a response to your query.
In some cases, ChatGPT will also share the source of the information as a reference. Clicking on it will open more details, including a link that can take you to the website, as shown in the screenshot.
Step 4. Ending a browsing session
The browsing session will remain active until you choose to turn it off or log out from ChatGPT. To turn it off, click on “New Chat” in the top left corner of the interface (navigation), then select “GPT-4,” and finally choose “Default” if you want to use GPT-4 without browsing.
If you prefer to use GPT-3.5, simply select “GPT-3.5” from the menu.
How to use web browsing feature in ChatGPT on mobile phone, iOS or Android
The web browsing feature is currently only available for use on the web. It has not been added to the mobile apps of ChatGPT. The only way to use it on your phone, at the moment, is by logging onto ChatGPT through a web browser and then following the instructions provided above.